Overview
Product Groups can be configured by administrators within iService to display specific product lists in the LifePipe search results. Selecting a Product Group on the LifePipe search page returns only results that are part of that pre-configured list of products.
For example, a group can be created specifically for your Bank Channel Agents which represents only the products and carriers they are licensed to sell. Alternatively, groups can be used to promote products or carriers most recommended by your agency, based on convertibility or other product features you find important.
Access Product Groups Configuration
1. Log into iService.
2. Select Profile Settings from the settings drop down.

For agencies with multiple GAIDs:
1. Select your agency from the My Offices list on the left side of the screen.

The Profile Settings page displays.
2. Click the Manage Settings link on the LifePipe bar.

3. Select the Product Groups tab.

Add a Product Group
1. Select the New Product Group button.

The New Product Group page displays.
2. Type a name for the Product Group in the Product Group Name field.

3. Use the Filter By drop downs to refine the list of product results. You can also use the Search field to find a specific product.
4. Select a product’s corresponding checkbox to add it to the Product Group.
5. Click Save at the bottom of the screen.
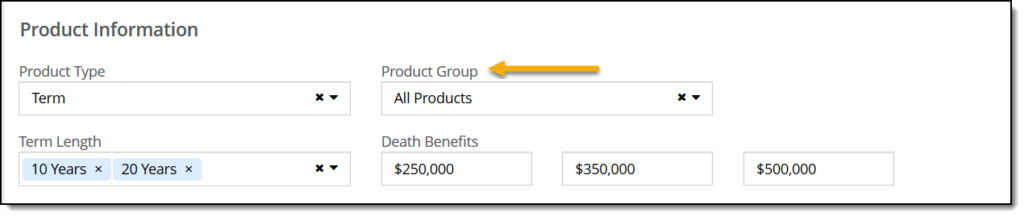
All configured Product Groups display in a Product Group drop down in LifePipe during the search refinement.
Edit or Disable a Product Group
You can add or remove products from an existing product group, or choose to disable a product group so that it no longer displays in the Product Groups drop down in LifePipe.
Edit a Product Group
1. Select the settings icon next to the corresponding Product Group.
2. Select the Edit option.

The Edit Product Group screen displays.
3. Update the Product Group name (optional) and/or make new product selections.

4. Click the Save button.
Disable a Product Group
1. Select the settings icon next to the corresponding Product Group.
2. Select Disable.

3. Select Save Changes in the top right.
The Product Group will no longer be displayed in the Product Groups drop down in LifePipe. To re-enable a Product Group, follow the steps above and select the Enable option.